Your Cart is Empty
All Orders arrive within 1-2 days
- Mobility
- Physical Therapy
- Home Care
- Bathroom Safety
- Supports
- Daily Aids
- Foot Care
- Health Devices
- Injury
- Best Savings
- Blogs
- 1-800-487-3808
- Business
- Login
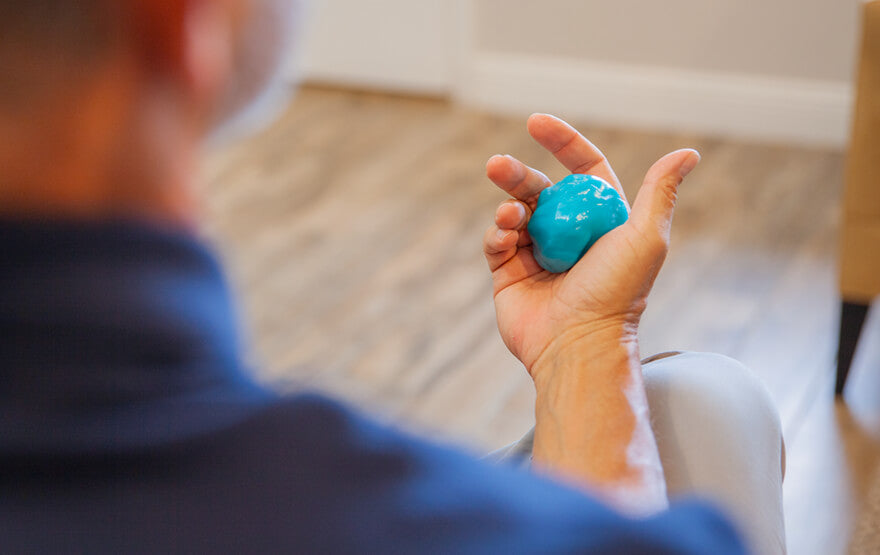
Therapy putty is a great rehabilitation tool for recovering from finger, hand, and wrist injuries. It is used by both physical therapists and occupational therapists alike as a favorite for treating a wide range of injuries and conditions. It can be purchased for home use or you can even make your own. Today, we will dive into what therapy putty is used for, specific exercises you can start, and other practical tips. Keep reading to learn more about how to use therapy putty.
In the therapy world, therapy putty is used primarily for strengthening the fingers, hands and wrists. Additionally, it provides benefits like increased blood flow for healing, optimizing functional hand range of motion, improving fine motor skills, and even stress relief. It comes in a variety of colors that are associated with different resistance levels (typically extra soft, soft, medium, and firm). In general, you will start with a lower strength color and gradually progress as your hand strength improves.
Most therapy putty is made from nontoxic and odorless silicone. This makes it safe for almost everyone to use. The silicone in this product also helps it last longer without getting grainy or losing its innate elasticity. If you have skin allergies always check the ingredients before purchasing, although most options on the market are now latex-free there are still some therapy putty products containing latex.
Your therapy putty has the potential to last months or even years with the right care. For the best results, always put your therapy putty back in it’s plastic container after each use. However, if you accidentally leave it out on occasion you can rest assured that it won’t be ruined. It can be left out or even washed and still retain its functionality for the long term. One purchase of therapy putty should last you for the entirety of your hand recovery and well beyond.
It's not uncommon for someone to by hypersensitive to scents. Therapy putty is designed to have as minimum odor as possible, especially since it's a tool that you use with your hands. The silicone material is typically odorless and won't leave any residue on your hands.

There are a variety of reasons someone may use therapy putty. Anyone suffering from the following issues, conditions, or injuries would benefit from consistent use of putty:
There is a lot of versatility that the use of exercise putty can provide. You can use it for a large variety of finger, wrist, and hand exercises to strengthen, promote circulation, increase dexterity, and reduce pain. You can also focus on fine motor skills by burying objects in the putty like marbles or buttons to dig out as well. Always start with a lighter resistance and progress as tolerated.
Here are some of the top exercises for the hands and wrist with therapy putty.
This exercise works the finger adductor and abductor muscles, essential for everyday hand function such as gripping and pinching.
Being able to pinch your fingers together without pain and good strength is another essential part of daily hand use.
You can also focus exclusively on thumb strength with a thumb press. Roll a small piece of putty into a ball and place it under your thumb. Push the thumb flat down into the ball toward the knuckles of the other fingers to make a thumbprint.
This exercise is great for general hand grip strength, since being able to grip something with your entire palm is essential. Plus, it’s a great stress reliever too.
This exercise is similar to the finger pinch but provides a more functional all-in-one approach for gripping and pinching. With this exercise, the two distal joints in the fingers remain straight.
This exercise works the extensor and abductor muscles of the fingers and wrist, important for providing balance and coordination in the hand.
In addition to a full finger spread, you can also focus on the finger strength of two at a time; wrapping the putty around two fingers and pulling them away from each other. Repeat around each pair of fingers until you have worked them all.
This strengthening exercise focuses on one finger extensor at a time, allowing you to focus on any specific problem areas.
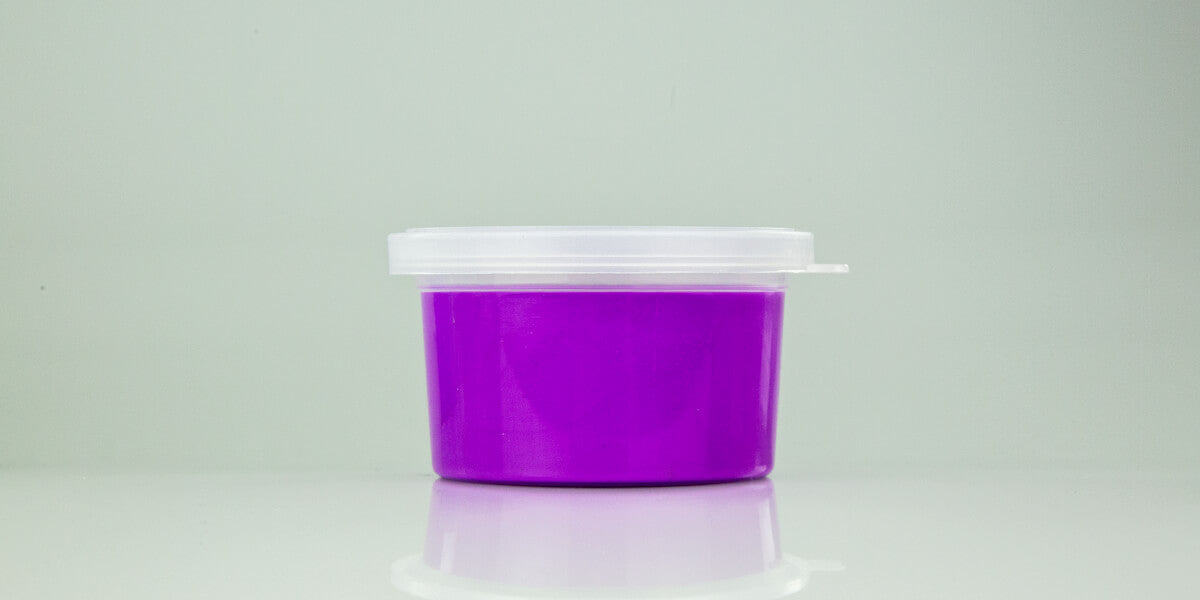
As mentioned in the earlier section about the longevity of your putty, how you store it is important for keeping the putty in it’s optimal state. For the best outcomes, simply continue to use the plastic container that your putty comes in. If the plastic container breaks or is lost, make sure you find a new airtight container for storing your putty. Then, keep the container in a neutral atmosphere with no extreme cold or hot temperatures.
If you don’t have therapy putty at home, you may also consider other options around your house like a stress ball, tennis ball, rolled hand towel, or rubber bands- depending on what exercises you want to focus on. While hand therapy putty is very affordable, you may also consider making your own at home too. There are a few different variations that you can find online to make your own that you can experiment with- essentially making a thicker form of silly putty. One of the most popular online recipes simply includes white glue, water, borax, and food coloring.
As you can see, therapy putty is a very versatile tool for the hand and wrist. Whether you have a new injury or are in the last stage of recovery, choosing the right therapy putty exercises can help you feel your absolute best. Proper strength, flexibility, and coordination of our hands is essential for daily function. Use of therapy putty can help you feel your absolute best.
If you are feeling unsure of where to start, a round of physical therapy or occupational therapy treatment can help you get on track. The guidance of a healthcare professional can always help in the recovery process. If your hand symptoms become severe or are putting a damper on your quality of life, it’s important to get medical advice promptly.
Sources:
https://www.yourbeautyblog.com/2016/08/how-to-make-theraputty.html
https://americanstroke.org/how-to-make-your-own-homemade-therapy-putty/


![The Benefits of Flexibility [A.K.A. The Secret Sauce for Aging]](http://www.vivehealth.com/cdn/shop/articles/Smiling-retired-woman-listening-to-music-while-stretching-legs-outdoors._600x.jpg?v=1713090677)


Let's Live Better ®
free Shipping Over $39
100% Satisfaction Guarantee
Lowest Price Guarantee
This site is protected by reCAPTCHA and the Google Privacy Policy and Terms of Service apply.
© 2024 Vive Health. All rights reserved.